A big part of interviews is development velocity and agility. And that can be optimized for.
I recently went through interviews at a couple of companies to eventually land my new gig at Shopify. Afterwards, I spent some time thinking how I evaluated candidates as an interviewer and how I approached my technical interview questions as a candidate. I realized that there’s probably some experience worth sharing, hence this blog post.
A blog post like this is highly opinionated, but I want to share it anyway in case it’s useful for anyone. It’s important to keep in mind that every company interviews their candidate differently. On top of that, each interviewer has their own way of assessing a candidate, not to speak of all the unconscious biases that shouldn’t, but do factor into interviews. What I am describing here is an observation of how I have tackled coding interviews. This means that this is strictly my experience and your mileage may vary.
Technical interviews
Coding problems are supposed to show how a candidate behaves with the task they will likely spend most of their time on: coding. For that reason these interviews are usually less of an exam and more of a pair programming session, where the candidate can use their tech stack and tooling of choice and the interviewer observes and even helps along the way. The problem often entails building something that works, so the interviewer can take the candidate through all stages of an app’s lifecycle. This has many advantages, like letting the candidate be in their comfort zone and while they show off their relevant skills. However, it also has drawbacks. The time frame of building a working “app” in 2 hours or less is clearly unrealistic and will force the candidate to make tradeoffs. This is also an important skill to have as a developer, but which tradeoffs are “good” or “bad” is highly subjective and evaluation should be done with care by the interviewer.
Think Before You Code
Before starting to code, I find it helpful to plan ahead and analyze the task at hand. The coding problems I encountered are often intentionally short and vague. Don’t let this frighten you! In my experience, you can use that to your advantage:
- A short description can’t hide details and gotchas in a wall of text.
- Vagueness means more room to interpret the problem in way that plays to your strengths.
- You can show off that you can spot vagueness early on and are able to create clarity with well-phrased questions.
Most coding interviews are between 40 minutes and 2 hours long. Different people work at different paces, so in my experience interviewers start with a very minimal version of the problem and make it more complicated over time. That also lets the interviewer see how the candidate adapts to a changing constraints. While interviewers should strive to evaluate a candidate to their strengths, I suspect that many interviewers use “how far” you got into a problem as an indicator for your engineering skill. If you make the interviewer run out of constraints to add, you probably did well.
However, even for the fastest of engineers, the time allotted to a coding problem is rarely enough to produce polished, production-ready code. Consequently, I believe that optimizing for iteration is a good bet to do well in coding interviews.
Optimizing for Iteration
Optimizing for Iteration, to me, means starting small, and doing many, small increments. Start with something basic and validate that it works. Then add the next small thing that brings you towards the larger goal. This actually takes a lot of self-discipline!
Each iteration should be runnable and allows you to verify that it works as expected. This way you only have to comb through a small amount of code changes if something breaks. This also makes it easy for the interviewer to follow along. In fact, in my interviews I even created git repositories and made commits for each iteration. That way I could inspect diffs or reset to the previous iteration if I went down a fruitless path.
Optimizing for Iteration also means to write code in a way that allows you to switch out parts easily as new constraints come in. My general advice to keep code flexible is to not hard-code constants, to use many small, well-named functions and to keep code DRY. Keeping functions small makes it easier to verify just by reading that a function does what it’s supposed to do. If constraints change, it’s often a matter of augmenting or replacing a single function, without having to touch any of the other parts. Another nice side-effect is that a good function name is basically documentation and helps the interviewer understand what you are doing.
Disclaimer: You should ask your interviewer what they are assessing. Is it development velocity? Accuracy? App performance? Polish? Accessibility? The answer can have strong implications for how valuable this blog post is for you.
When I think through the problem and how I want to structure my code, I think about those two things: Enabling me to move fast so I can go as far as possible into the problem and allowing me to build up the solution incrementally, keeping additions small and verifiable, switching out code bit by bit over time.
This has also influenced how I tackle coding outside of interviews: My main mantra for any given coding task is “make it work, make it right, make it fast”. In an interview, I rarely expect to get beyond the “make it work” phase. To move as fast as possible I also consider taking shortcuts with techniques that would probably not fly in production code. If a shortcut seems particularly cheeky, I recommend checking with the interviewer. At worst you lose some time showing off that you can evaluate multiple, creative solutions before being to do it “right”. At best the interviewer is completely fine with the shortcut and you get to maintain velocity. In my experience, interviewers are often fine with shortcuts as the goal is not to find their solution, but rather observing how the candidate solves the problem with their skills and strengths.
Technically, that’s all there is for this blog post. Optimize for iteration. What prompted me to write this blog post is a friend of mine sharing an interview question with me that they got in an interview. So for the remainder of the blog post, I’ll work through that interview question as an example. I hope that will help make things like “taking shortcuts” clearer. Let’s go!
The problem
The interview question, as expected, is rather short and to the point:
“Build a spreadsheet-like web app from scratch. Start simple, with a 10 by 10 grid, and add features like cell referencing as we go along.”
Just to be clear: I didn’t encounter this question in an interview personally. I’ll be pretending to go through a ~60 minute interview with an imaginary interviewer. And what you will read here is how I would tackle this question and how I predict the interview would go, informed by my experience in interviews. While reading all of this, it’s important to remember that the most important part of an interview is communication. Keep your interviewer in the loop! Not only tell them what you are currently doing, but also what you are working towards. Think out loud and describe what your ideas are and how you plan to implement them. Most interviewers want to help and will reinforce good ideas and try and prevent you from going down the wrong path. A coder that can’t articulate what they are doing is likely not going to do well in a team environment.
It’s also worth nothing that this might not actually be a great interview question. Spreadsheets (like Google Spreadsheets) have a whole team of engineers working on multiple aspects of the app. So tasking you with building something similar in 60 minutes will force the candidate to take shortcuts, which could lead to a bad impression if the assessment criteria are not communicated clearly. Again: Talk to the interviewer to make sure you are not going in a wrong direction.
Level 1: Scaffolding
Before I start to write any code, it’s a good idea to set everything up. As I said, time is crucial in an interview, so I don’t like messing around with a build system unless absolutely necessary. In most interviews I end up writing vanilla JavaScript, CSS and HTML, and use something like npx superstatic . to spin up a web server. If I need to build any dynamic UI, I often assemble HTML strings and assign them to .innerHTML. That has all kinds of issues, especially when processing user input, but that is usually fine to do in an interview. Remember: In my approach, “make it work” comes first. “Right” and “fast” can come later.
Note: This is highly subjective. In the “make it work” stage, in my opinion, everything goes. Use whatever you know the best, what you are comfortable with and what allows you to move fast. For me, that’s vanilla JS and using the platform directly. If it’s React for you, use React. However, if you deviate from industry best practices or the company’s tech stack, it might not work in your favor.
For this problem, I’m going to use Preact, so I need something to process JSX. I love using Jason’s htm to avoid a build stage altogether, but it might confuse the interviewer. For a quick dev setup that supports JSX, I’d currently go for Vite. It’s default config is sensible, it compiles fast and has very little magic. It also supports TypeScript, but I rarely use it in interviews for the sake of velocity. Let’s set up the basic structure of the project.
$ npm init -y
$ npm i -S preact vite
$ npx vite .
<!DOCTYPE html>
<main></main>
<script type="module" src="./main.jsx"></script>
// main.jsx

/* @jsx h */
import { render, h } from "preact";

import Spreadsheet from "./spreadsheet.jsx";

const main = document.querySelector("main");
render(<Spreadsheet rows={10} cols={10} />, main);
// spreadsheet.jsx

/* @jsx h */
import { h } from "preact";

// Returns an array [0, 1, 2, ..., length-1]
function range(length) {
  return Array.from({ length }, (_, i) => i);
}

export default function Spreadsheet({ cols, rows }) {
  return (
    <table>
      {range(rows).map((y) => (
        <tr>
          {range(cols).map((x) => (
            <td>
              <Cell x={x} y={y} />
            </td>
          ))}
        </tr>
      ))}
    </table>
  );
}

function Cell({ x, y }) {
  return (
    <span>
      {x}/{y}
    </span>
  );
}
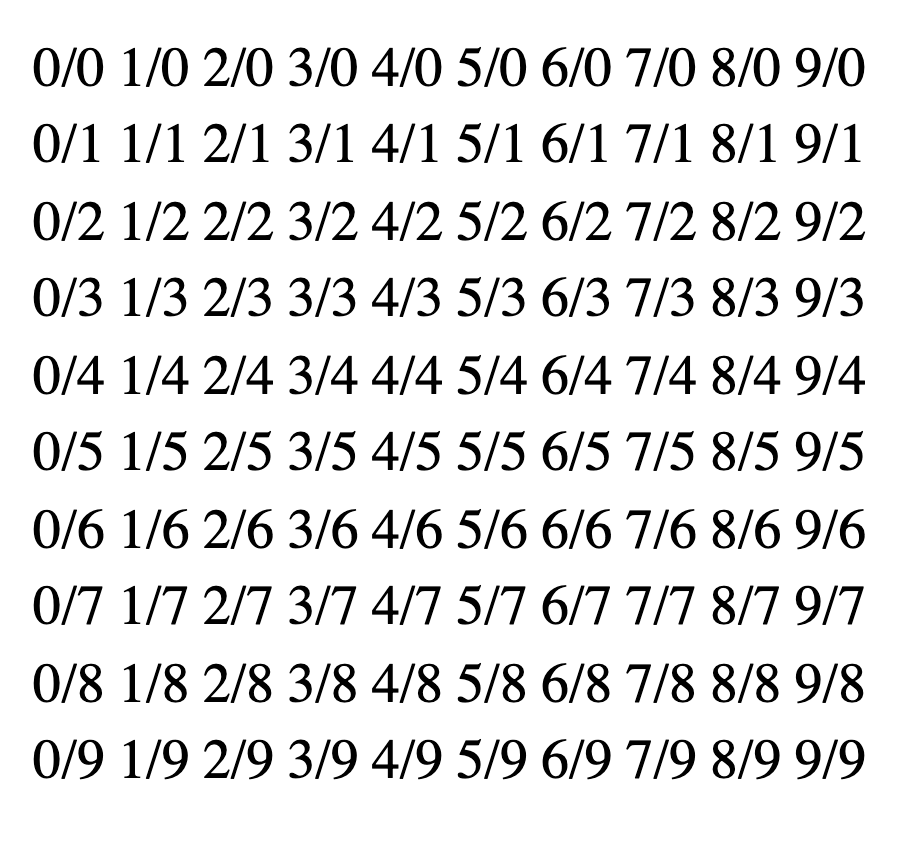
I chose to start with generating a table as a first iteration. There’s no business logic that could go wrong and it allows both me and the interviewer to see what part of our app is working correctly. Single-line functions like range are common utility functions that reduce noise in your code. Write and use them liberally.
<table> is a quick (and semantically correct!) way to render a spreadsheet-style document.Disclaimer: You might feel an itch to point out that I didn’t use HTML tables correctly (where’s <thead> and <th>?) and that this will be increasingly hard to make accessible. Both is true. Using a table is, in fact, the semantically correct element to use and will do better than <div> soup with CSS grid. That, of course, doesn’t mean that this is properly accessible by any means and it depends on the position and the role whether or not this is acceptable. The more senior your role, the more I’d expect interviewers to insist on at least basic platform-provided accessibility. Depending on what you're being asked to build, accessibility could either be expected (like when you are building a check out form) or not (maybe for something like a canvas-based game).
The plan is that the <Spreadsheet> component will handle the overall state and contain the logic for processing the formulas later on. The <Cell>’s job is mostly to be a toggle between showing a cell’s value and an <input> field so the user can edit the formula. I’ll implement that a bit later.
If, for some reason, you want to look at this demo, here’s the live demo and the source code.
Visual aid
In interviews I usually ignore aesthetics. After all, I am building a Proof Of Concept (POC), something even more crude than a Minimal Viable Product (MVP). The browser’s default styling will do just fine. However, the UI still needs to be clear; and this is not. Without labels for the rows and columns it will be hard to effectively communicate with the interviewer. So let’s fix that:
// ...
function spreadsheetColumn(idx) {
  return String.fromCharCode("A".charCodeAt(0) + idx);
}

export default function Spreadsheet({ cols, rows }) {
  return (
    <table>
      <tr>
        <td />
        {range(cols).map((x) => (
          <td>{spreadsheetColumn(x)}</td>
        ))}
      </tr>
      {range(rows).map((y) => (
        <tr>
        <td>{y}</td>
          {range(cols).map((x) => (
            <td>
              <Cell x={x} y={y} />
            </td>
          ))}
        </tr>
      ))}
    </table>
  );
}
// ...<!doctype html>
<style>
table {
border-collapse: collapse;
}
tr:first-child,
td:first-child {
background: #ddd;
}
td {
min-width: 50px;
}
</style>
<main></main>
<script type="module" src="./main.jsx"></script>spreadsheetColumn turns a column number into the letters we know and love from Excel & co. It is also an example of a shortcut. This function will create nonsense if it’s given a column index above 25, but the interviewer limited the columns to 10 for now, so that will work just fine. This way I can avoid spending time on the slightly more complex code that returns "AA" for idx = 26 and so on. If the interviewer decides they want a bigger spreadsheet, I only need to go back to this one function and fix it.

Again, here is the live demo and the source code.
Now that I have the visuals set up, I need to think what my next iteration is. While it is tempting to start with the core logic — calculating formulas in a grid — the core logic will be hard to test without a UI that lets me input values. But even if my UI could take user input, there’s nowhere to store that input yet. So in the next iteration I’ll add an underlying state object that contains all the cell values and make the <Cell>s render these value instead of their coordinates. All the spreadsheet logic can then work on this state object, decoupled from the UI framework.
State object
The state object is just a POJO, and we will have our core logic work on that object later on. A somewhat controversial opinions is that I do think that OOP has a place every now and then, and this might be one of those situations. Tying the data object together with the functions that operate on it seems not only reasonable but also like it makes the code more expressive. But this is definitely a question of taste and many roads lead to Rome. For the purpose of this blog post, I wrote a class that will contain all the logic a spreadsheet needs.
class SpreadsheetData {
  constructor(rows, cols) {
    this.rows = rows;
    this.cols = cols;
    this.cells = Array.from({ length: cols * rows }, () => ({
      value: 0,
    }));
  }

  getCell(x, y) {
    return this.cells[y * this.cols + x];
  }
}
Now I need to instantiate this class and use it as our data input for our components somehow. I could either use useState or useReducer. I know that later on, updating a cell’s value will be accompanied by additional logic will have to run, and that feels more natural to me with useReducer.
function useSpreadsheetData(rows, cols) {
  const [{ data }, dispatch] = useReducer(
    ({ data }, { x, y, value }) => {
      const cell = data.getCell(x, y);
      cell.value = value;
      // Shallow copy to force a re-render.
      return { data };
    },
    { data: new SpreadsheetData(rows, cols) }
  );
  return [data, dispatch];
}
I am writing my own pseudo-hook here to keep the component function to be mostly about markup. It also allows me to hide some of the component-specific workarounds in a function, which can make future endeavours (like maybe I could even run the spreadsheet calculations in a worker later on 🤯) easier. Again: Lots of small functions make for easier refactoring!
Note: I’m fairly new to hooks. If I’m being unidiomatic here, I apologize. Some might take offense that I am using a mutable data structure as state here, but it works and makes it quite easy to follow, in my opinion.
I can’t use an instance of the SpreadsheetData class with useReducer directly. Preact checks for object equality to decide whether to rerender a component. My class instance will always be the same object and that means the component would never rerender. Wrapping the class instance in an object and creating a new wrapper object on every dispatch() call forces object inequality and subsequently a rerender. The dispatch() function takes a cell’s coordinates and the new value and updates the spreadsheet data accordingly.
Now on to pipe the state object to our <Cell> components:
export default function Spreadsheet({ rows, cols }) {
  const [data, dispatch] = useSpreadsheetData(rows, cols);

  return (
    // ...
      <td>
        <Cell x={x} y={y} />
        <Cell
          x={x}
          y={y}
          cell={data.getCell(x, y)}
          set={(value) => dispatch({ x, y, value })}
        />
      </td>
    // ...
  );
}

function Cell({ x, y }) {
  return <span>{x}/{y}</span>
function Cell({ x, y, cell, set }) {
  return <span onclick={() => set(cell.value + 1)}>{cell.value}</span>;
}
This iteration is all about making sure that there’s an underlying state object, that it gets visualized correctly and that it reflects updates to the state object. To test and debug that, I need to be able to make changes to the state object. I am not confident that I would implement the toggle to a <input> field right on the first try, and I don’t want to lose time debugging the functionality that itself is supposed to help me debug. Instead, my choice here is a simple onClick handler that just increments the cell’s value by — something I’m fairly certain I can write without error on the first try.
As before, here is the live demo and the source code.
Both the interviewer and I can see that the SpreadsheetData is turned into a table and that it responds to changes by the user. If there was a bug, the small code diff would help me isolate what went wrong quickly. For the next iteration, my plan was to just allow the user to input any formula for a cell. That turned out to be such a small change that I actually forgot to make a commit and also implemented the logic to evaluate those expressions in the same iteration.
Expression evaluation
My first thought when reading the problem description was that a two hour time frame (let alone one hour) is not enough to write a full expression parser. Even without referencing the value of other cells, something as simple as 1+2*3 would need a parser that respects operator precedence. Instead, my immediate thought was to ask the interviewer if using eval() is acceptable, while pointing out that I am aware of the potential security impliciations.
Note: If writing parsers is your strength, go for it! Use the ambiguous phrasing to interpret the problem in a way that makes you look good!
I’d expect that the interviewer to reply with “that’s fine!”, unless you are interviewing to work as a compiler engineer. But then I’d seriously question the interviewer’s choice of question here.
Formulas
Currently, each cell has a value property in the state object. But now a cell needs to have a formula and a computed value. So I added a second property to each cell:
class SpreadsheetData {
  constructor(rows, cols) {
    this.rows = rows;
    this.cols = cols;
    this.cells = Array.from({ length: cols * rows }, () => ({
      value: 0,
      computedValue: 0,
    }));
  }
Of course, I need to allow the user to input expressions somehow. So we switch out our one-line <Cell> componentfor a brand new one:
function Cell({ x, y, cell, set }) {
  const [isEditing, setEditing] = useState(false);

  if (isEditing) {
    return (
      <input
        type="text"
        value={cell.value}
        onblur={(ev) => {
          setEditing(false);
          set(ev.target.value);
        }}
      />
    );
  }

  return <span onclick={() => setEditing(true)}>{cell.computedValue}</span>;
}
I don’t know if drilling down to a DOM element using ev.target.value is idiomatic in React, but it works like a charm! Notice how I display cell.computedValue when the user is not editing, but use cell.value as the value for the input field.
eval
In Excel, formulas are only evaluated when you start with =. In this context, I expect that the interviewer doesn’t care for an exact implementation of the syntax that Excel uses. Instead of having a two code branches, one for formulas and one for constants, I just treat every value as something that needs to get eval()’d. It’s another shortcut that only saves a tiny amount of code, but avoiding code branches can save me from unexpected complications in the future. Through eval(), the user gets access to all of JS, including Math.sqrt(), Math.pow() and even if statements. That’s pretty great, but is not without problems: The user also gets access to while(true), which can freeze the entire app indefinitely. The user could also register a ServiceWorker. The user could also implement an entire spreadsheet app within a cell of this spreadsheet app. Whether or not those are bad things requires careful consideration, something I don’t have time for in an interview. I’d point it out to the interviewer and move on (unless they stop me and want to talk more about this).
class SpreadsheetData {
  // ...
  generateCode(x, y) {
    const cell = this.getCell(x, y);
    return `(function () {
      return ${cell.value};
    })();`;
  }

  computeCell(x, y) {
    const cell = this.getCell(x, y);
    let result;
    try {
      result = eval(this.generateCode(x, y));
    } catch(e) {
      result = `#ERROR ${e.message}`;
    }
    cell.computedValue = result;
  }
}
I decided to generate the code I pass to eval() in a separate function. Code-as-a-string is often hard to read, due to the lack of syntax highlighting and the mixture of code and variable interpolation. Putting it in a function encapsulates that grossness and also lets me easily log the generated code to the console to check that it’s correct. I also added an IIFE wrapper around the generated code, mostly to give me a quick way to make helper functions available in cell formulas — a feature I ended up not using at all. A cell value like Math.sin(123) + 1 would generate the following code:
(function() {
  return Math.sin(123) + 1;
})();
If eval() throws, I catch the exception and show the oh-so-familiar #ERROR symbol. Since I know the interviewer will ask me to add cell referencing later, I also know that a change to one cell can affect other cells in the future. So I’ll just recompute every cell’s computedValue every time. That’s inefficient, but keeps things simple.
class SpreadsheetData {
  // ...
  computeAllCells() {
    for(const y of range(this.rows)) {
      for(const x of range(this.cols)) {
        this.computeCell(x, y);
      }
    }
  }
}

function useSpreadsheetData(rows, cols) {
  const [{ data }, dispatch] = useReducer(
    ({ data }, { x, y, value }) => {
      const cell = data.getCell(x, y);
      cell.value = value;
      data.computeAllCells();
      // Shallow copy so that preact doesn’t skip rendering.
      return { data };
    },
    { data: new SpreadsheetData(rows, cols) }
  );
  return [data, dispatch];
}
I have to say, a spreadsheet app that just uses JavaScript actually seems totally desirable to me. And since it doesn’t store user data or cookies, I actually don’t really see what there would be to exploit with evil eval().
Here is the live demo and the source code.
Only one more iteration left: Referencing the values of other cells!
Cell referencing
Formulas in Excel can reference the value of another cell by using the cell’s name. For example =A1 * 2 in Excel would show the value of cell A1 doubled. Since our app evaluates the cell’s formula as plain JavaScript, I can make the other cell values available by declaring variables with the cell names:
class SpreadsheetData {
  // ...
  idxToCoords(idx) {
    return [idx % this.cols, Math.floor(idx / this.cols)];
  }

  generateCode(x, y) {
    const cell = this.getCell(x, y);
    return `(function () {
      ${this.cells
        .map((cell, idx) => {
          const [x, y] = this.idxToCoords(idx);
          const cellName = `${spreadsheetColumn(x)}${y}`;
          return `const ${cellName} = ${JSON.stringify(cell.computedValue)};`;
        })
        .join("\n")}
      return ${cell.value};
    })();`;
  }
This augmented generateCode() function adds the values of all cells to the IIFE before finally evaluating the formula. A formula like Math.sin(A0) + A1 would generate the following code:
(function () {
  const A0 = 123;
  const A1 = 0.5;
  ...
  const J9 = 0;
  return Math.sin(A0) + A1;
})();
This size of the generated code will grow substantially with the size of the spreadsheet. Again, not every efficient, but good enough for a prototype written during an interview.
With the ability to reference the value of another cell, I can now write more complex formulas and get the right result. However, if I had a reference chain — like A0 references A1, A1 reference A2 and A2 references A3 — and I changed the value in the last chain member, only the immediately previous chain member would get updated. In a polished version of this app I’d expect to find a proper parser that explicitly maintains a list of references per cell. That would allow me to figure out which cells needed recomputing in response to a value update and also let me detect cyclic references. But I don’t have that here. Instead, I can just keep recomputing all cells until nothing is changing anymore. That will break in the case of two cells referencing each other, but — once again — I’d say that’s acceptable in the context of an interview.
class SpreadsheetData {
  // ...
  computeCell(x, y) {
      // ...
      const hasChanged = result != cell.computedValue;
      cell.computedValue = result;
      return hasChanged;
    }

    computeAllCells() {
      let hasChanged = false;
      for (const y of range(this.rows)) {
        for (const x of range(this.cols)) {
          this.computeCell(x, y);
          hasChanged = hasChanged || this.computeCell(x, y);
        }
      }
      return hasChanged
    }

    propagateAllUpdates() {
      while(this.computeAllCells());
    }
    // ...
}

function useSpreadsheetData(rows, cols) {
  // ...
  data.computeAllCells();
  data.propagateAllUpdates();
  // ...
}
And now for the grand reveal/proof that this is actually a functioning spreadsheet:
And for one last time, here’s live demo and the source code.
Conclusion
Sadly, I didn’t exactly time when I was done, but I do know that I was under the 60 minute time limit. And that was mostly thanks to some cheeky shortcuts and optimizing for iteration. Well and the fact that it was a completely simulated interview with no real interviewer and a complete lack of stress and nerves. And again: The most important thing is to communicate with your interviewer so you know what they expect and what is and is not okay to do. Overall, though, I have fared well with “Make it work, make it right, make it fast” both inside and outside of interviews.
I did play around afterwards a bit and moved the spreadsheet logic to a worker (because of course I did) and added cycle detection, but both would make this blog post prohibitively long and are left as an exercise for the reader. In fact, Luca Casonato from the Deno team and I have been “producitonizing” this eval()-based spreadsheet as fun experiment, and you can find it on here.